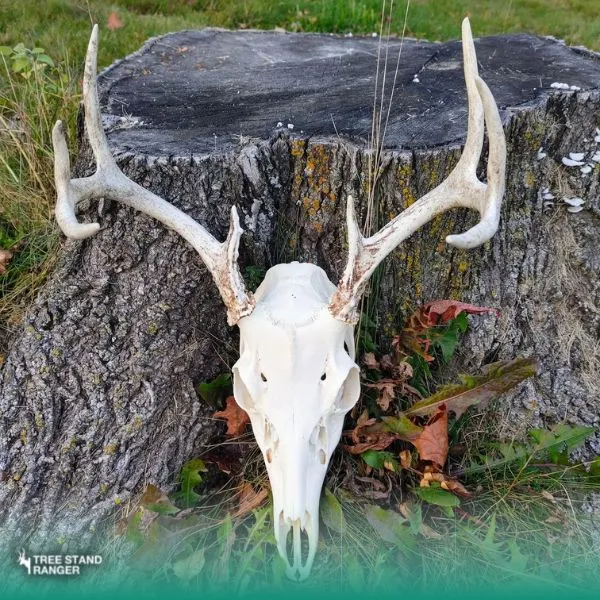
Some hunters love using deer body parts for decoration purposes via taxidermy. Maceration deer skull is a unique way of cleaning a deer skull from the skin, meat, and even teeth. After the completion of the maceration, you get the animal skull with horns only.
However, it is not as straightforward as it sounds. Maceration involves a series of careful steps. From removing the head to skinning it out, degreasing the bones and teeth to whitening it, there is much to be done.
Maceration deer skull is a time consuming process and takes about 3 to 4 weeks to complete. Starting from skinning the head to the final finish, you have to stay extremely patient if you want the desired results.
Our experts have been performing this process for quite a while now and have shared how it is done on a DIY basis.
Maceration Deer Skull Process
Taxidermy includes a flesh-free animal. Sometimes, people get it done for the entire body, while others just get the head macerated out.

What is Maceration?
The maceration deer skull is often known as the European Mount. This includes the skull of a buck with or without antlers/horns. There is a large number of people who love to buy animal skulls from the market. Moreover, people often make best rattling antlers to call big bucks to hunting spots.
However, true hunting enthusiasts don’t rely on ready made pieces and want to mount the skull of the animal they had shot. With the use of strong bleach and chemicals, maceration results in the disintegration of the meat and bones from the animal’s skull.
As mentioned above, doing so leaves a skull bone with antlers (if the animal had one). It is further processed for cleaning and preservation to be used for decoration.
The only drawback of maceration is the disgusting smell throughout the process. The stench is likely to stick to your clothes while working, even after a couple of washes.

How To Skin A Deer Head For European Mount?
If you are successful with the hunting endeavor and now want to use the skull of your trophy animal as a European mount, try maceration. You need to pack out hunted deer in a specific way and bring in all necessary organs.
The process is similar for elk as well, but we recommend you start small to get hold of the necessary experience and confidence. For elk maceration, make sure you know how to pack out an elk properly.
Being a complex process, it requires skills in precision, steadiness, and patience for each step.
Required Tools
- A sharp butchering knife set
- A large pot or bucket
- An aquarium heater
- Heat resistant gloves
- Whitening agent or bleach
- A wide brush
- 40-volume hydrogen peroxide
- Water hose with jet spray
- Dish soap
- Plastic wrap
- Aluminum wrap
- Electric tape
Skinning Skull
Skinning refers to removing the skin covering the buck’s head. Take a sharp knife and start making an incision from either end of the mouth. Go straight from there till the back of the neck and come around from the other side in the same way.
As you make a cut, use the tip of the knife to detach the skin with the skull from the inside. Also, you should focus on degreasing i.e., removing all the fat that you see. At this point, your only goal should be to take off the skin so, don’t worry about gutting anything from the skull.
It is better to skin the deer’s skull while you are harvesting it. The longer you keep it, the more its flesh will decolorize. This can cause issues in recognizing the fat while skinning. Also, older skulls with skin smell a lot more terrible.
Break Down The Tissue
Don’t spend forever picking and pulling the connective tissues and thin membranes off the buck’s head. You can simply try the deer skull boiling method and get rid of it all effortlessly. Boiling deer head before anything else also eats away every kind of bacteria. This not only makes the process easier for you but also a lot less unhygienic.
But how long do you boil a deer skull? It could vary from skull to skull.

For heads with the brain, tongue, and everything else still intact, it could take from some hours to a couple of days. Whereas, for only the skull, it would take a lot less. The majority of tissues break down in 30 to 60 minutes. Sometimes it can even take more than an hour, you just have to keep checking.
How to boil a deer skull
If you have a skull with the brain, tongue, eyes, and jaw removed, here is how to boil a deer skull:
- Take a large pot in which the animal’s head can fit easily.
- Place the skull into the pot with antlers straight up and pour water into it.
- Don’t submerge antlers in the water, cover them with aluminum foil wrap.
- Add 2 to 3 full tablespoons of any dish soap into the water. It will slightly speed up the tissue breaking process. Furthermore, all the extra oil in the pores of the bones comes out because of the dish soap.
- Keep refilling the water as it evaporates due to heating, stop right where the antlers start. Make sure to cover the entire skull bone with water.
- Now try removing the tissues. If these come out easily, you are all set to clean the skull. If not, boil it again for 10 to 15 minutes.
Boiling The Skull With Brain And Tongue
After degreasing bones, it’s time to boil the skull for easy removal of tissues, flesh, and other parts. The steps include:
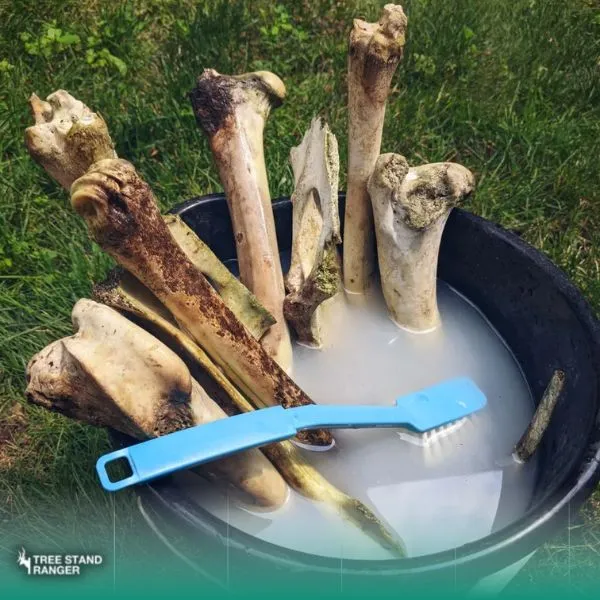
- Put the head in a bucket with antlers out.
- Place an aquarium heater in it and keep the temperature range between 80 to 100° F.
- Use a heat-safe black plastic bag and cover the entire bucket. Tie a cinch knot at the end. This will keep the horrible smell from spreading into the environment.
- Leave the skull in water for 2 days and then change the water.
- It is suggested to dig a deep hole in the ground, pour water into it, and cover it. This minimizes the maceration smell. If you pour it above the ground, the filthy smell with attract numerous beetles and other harmful insects around.
- Change water after every 2 days for a total of 4 to 6 days. Doing so will allow the bacteria to disintegrate everything except the skull completely.
- If you observe that the meat and other parts are not entirely rotted, you can keep it in water for another two days.
Remember, the nasal bone is likely to break after boiling. It is better to stay extra careful when removing tissues around it.

In case it comes off anyway, you can put it back together using super glue. But, do it when the skull has completely cooled down and secure the position by zip-tying it.
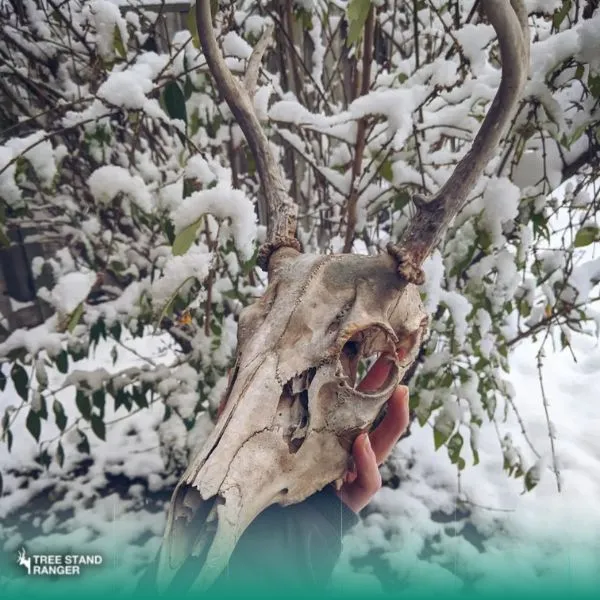
You might also notice the bone color changing to yellow or brown. Relax. It is easily turned bright white using a bleach or whitening agent.
Note: The best way to ensure the proper maceration skull cleaning is by determining the quality of water. If it is clear, you are good to go. However, if the water is cloudy and still has a strong stench, keep going with maceration until it gets clear.
Removing The Teeth, Jaws, And Eyes
For a Euro mount, cleaning the deer skull cap, and removing the lower jaw is essential. At this point, the bones are soft enough that you can pull out the lower mandible easily. The eyes would already be extremely soft, push them down, and they will pop out. Don’t forget to wear durable rubber gloves.
Ear canals are relatively difficult to clean. You can use a bamboo stick with cotton tied on one end. Insert it in the canal and push it on the other side to clean. Using a large tweezer might also work to pull out the meat or anything from the ear canals.
Once you have got rid of everything from the skull, immerse it into the water for one last soak. Take it out after 30 to 45 minutes and let it set at room temperature. You might notice some pinkish-white substance on the skull known as corpse wax.
You can scrape or brush as well as wash it with a jet hose. This step is for every type of skull, with or without meat and stuff. A fresh deer head takes nearly 1 to 2 weeks to degrease completely. This process will remove even the thinnest layers of fat from the head.
If you skip degreasing, the fat layer can cause discoloration in the skull in the long run, even after whitening. As the deer’s head dries, check the area underneath the bone. If it is still wet, it means there is some fat that needs to be removed. For complete removal, boil it in the water at 110° F.
Cleaning Deer Skull And antlers
When it comes to how to clean a deer skull, the method is quite simple i.e., use a water jet. Though it is the best way to clean a deer skull, don’t wash it with very high pressure, or it can damage the softer bones.
This process of cleaning a skull, as well as the antlers, removes all the extra layers of fat, dirt, and tissues that you couldn’t take off. Let the head dry in the air or in direct sunlight.
Bleaching/Whitening The Skull
This is the last and the most favorite part for everyone. By now, you have done all the hard work, and it’s just the final touches. You can either purchase a skull bleaching kit or simply use any whitening agent or bleach.
Hydrogen peroxide plays a vital role in both methods. So, make sure to carefully understand the steps and learn how to use 40 peroxide to whiten deer skulls.
How To Bleach A Deer Skull?
The first step is to cover the antlers with plastic wrap and secure them with electric tape. Since you would be working with a strong hydrogen peroxide chemical, it can decolorize the antlers if it gets on them. So, make sure to cover them appropriately. It is not necessary to cover the entire antlers. Just a good wrap at the base would be fine.
Take a large bucket and fill it half with 3% hydrogen peroxide and half with clean water. Heat the water up to 60 to 80° F and cover the top with a plastic bag. Check every day for your desired whiteness and take the skull out after 3 days max. Don’t keep it submerged in the solution for longer than 3 days. You can reuse the solution for multiple deer heads.
Rinse the animal’s skull with water having a similar temperature. The rapid shift in temperatures can cause the bones to separate. Leave the skull to air dry completely.
How To Whiten A Deer Skull?
Just like you do for bleaching, cover the base of antlers with plastic wrap for this process, too. The difference between bleaching and whitening is that you would be using a whitening powder for this method. It also involves using hydrogen peroxide but in a creamy form.
If the skull you are using is not fresh, follow the same steps to learn how to whiten an old deer skull.
Begin with creating a mixture of whitening powder with other chemicals. Hydrogen peroxide is used for hair color treatments so you can find it easily at any salon.
Take half a cup of 40-volume hydrogen peroxide and two to three tablespoons of basic white powder. The mixture should neither be too thick nor too runny. In simpler words, it should stick to the bone as you apply.
Use a brush to cover the antlers with the paste. Add a liberal amount of mixture on teeth because these tend to be a lot more stained depending on how old the deer is. Make sure to cover the nasal cavity, crevices, and eye sockets. Use a plastic sheet to cover the skull in it, and let it dry for two days.
Take off the sheet and rinse the skull with water. Gently rub the paste so all of it gets washed off. Check if the head is white enough according to you. If not, apply another layer. For the second layer, try covering the yellow spots more and those around the base of the antlers.
Once it is fully dried after two days, rinse it and pat dry using a paper towel. Leave the head for an hour or two in order to ensure its complete dryness.
Some people use non-chlorine swimming pool shock treatment for whitening the skull. The most common one is the BO or Baquacil Oxidizer. It is 27% hydrogen peroxide and whitens deer skulls a lot faster.
Make sure to wear nitrile or latex gloves, goggles, as well as a full face shield while working with this pool product.
Apply The Finish
Do you find something missing even after bleaching/whitening the buck’s head? It’s probably the final polish. You must be wondering how to polish deer antlers and with what product. Fortunately, there are no specifics, and you can use any varnish that brings shine to various surfaces.
It is better to use a tile polish as these are designed for various surfaces. Hence, it will do the job amazingly on a buck’s head. Apply a generous amount of polish and leave it to dry completely. Once done, your Euro mount maceration deer skull is all set to be hung.
How To Prepare A Deer Head For Mounting?
When the maceration deer skull dries off properly after the varnish, you can prepare it for mounting. This is when you will check if there’s anything missing or not. Remove the plastic sheet from the antlers that you wrapped while polishing.
Take a paper towel and dab it on the bones to determine if there are any leaks. These could be the solution or fat. If you have degreased it appropriately, it is rare to find any leakage or fat.
After the skull, it’s about time you clean and stain those antlers. These are prone to dull coloration with time. To restore the look, use a brown-colored furniture stain. Grab a q-tip, dip it slightly in the stain, and rub it around the base of the antlers.
If the antlers have a good color already, there is no need to apply the stain. However, if not, you can use a sponge, take a very small amount of stain, and rub it all over the antlers. For a more natural look, you can use coffee grounds mixed in some water and apply two coats of it.
Deer skulls generally have the last vertebra attached at the back, which you need to chop off before mounting. With the skin removed, you can notice that the skull comes down naturally, and the neck starts.
Around the semi-circular side plate, the last vertebra is nearly one centimeter away from there. As you find it, cut it out carefully.
Now that the maceration deer skull is prepared for mounting, watch this video to Euro mount it in an inexpensive way.
How To Remove, Clean, And Preserve Deer Antlers for Taxidermy?
Taxidermy of antlers is another widely known and loved process. It helps the hunters to keep it as a souvenir from their memorable hunting experience.
Removing Deer Antlers
Unlike the maceration deer skull, this process only involves antlers with a skull cap mounted on the wall.
The first step is to remove the antlers from the head. Begin with removing the ear muscles from both sides and slice down the skull bone from the back.
Grab a bone saw and place it right where you want to cut off the antler skull plate. Do it from the front and then remove it from the back. Now you have the antlers with a skull plate for mounting.
Cleaning Deer Antlers
- Soak the antlers in warm water with dish soap for 30 to 60 minutes.
- Take them out and rub gently using a scouring pad.
- Don’t get too harsh with the scrubbing, or it could damage the antlers.
- Rinse the antlers and leave them to dry.
Preserving Deer Antlers
To preserve antlers for mounting, take a large bucket and add 2 gallons of water along with 1 full cup of Borax. Soak them for about 24 hours, let them dry, and mount them on the wall. Antlers would stay like that for a significantly long time.
On the other hand, for preserving deer shed antlers, make sure to keep the antlers indoors all the time. In a bucket, mix turpentine and linseed oil in a ratio of 1:1 for a couple of hours. Once dried out, use furniture polish to secure the coating. You can also use quarter-boiled linseed oil, coat it on the antlers, and let them dry.
How To Clean Bones Without Hydrogen Peroxide?
Hydrogen peroxide is commonly used for bleaching or whitening antlers. You can easily clean deer antlers without this chemical.
- In a bowl, add some dishwashing soap and water.
- Use an old toothbrush, dip it in the solution, and gently rub the antlers.
- This will remove a great amount of dirt, making the antlers look pretty neat.
- Hang them until fully dried.
Conclusion
The maceration deer skull is an interesting way to preserve the head of your successful hunt. Though it is extremely time-consuming, the results are absolutely worth the wait and effort.
The only issue you might face during the process could be broken bones or teeth. Fortunately, these are easily put back together using glue. Make sure to follow the guidelines appropriately and get yourself an appealing maceration deer skull.
Frequently Asked Questions (FAQ’s)
When using 3% hydrogen peroxide with water, soak the skull in it for 1 to 3 days max.
You can easily clean old, dried-out, uncolored, and chalky antlers with simple steps:
Grab a steel wool and rub off all the chalkiness from the antlers.
Cover the skull with plastic wrap and secure it with electric tape.
Take some large coffee grounds and rub them all over the antlers generously.
Apply relatively fewer coffee grounds around the tines since these get rubbed from trees a lot; hence, they are lighter in color.
You will see some coloration on the antlers after an hour or two. Clean the coffee grinds from it using a paper towel.
For the second coat, make a mixture using fine coffee grounds and some water.
Rub it in a similar way, all around the antlers for a richer color.
After it’s completely dry, take a toothbrush and gently rub off the coffee grinds.
Lastly, take clear spray paint and apply it all around the antlers to secure the color.

About Alex David
I am an avid bow hunter and author of Tree Stand Ranger. Hunting from tree stands has been a passion of mine for many years. I’ve had the privilege of owning several tree stands and hunting properties throughout my life, and I take great pride in having the opportunity to do so. Read more about me.
Related Hunting Guides
Tree Stand Hunting
- Best Lightweight Tree Stand 2024
- Best Ladder Stand For Deer Hunting 2024
- Best Double Ladder Stand 2024
- Best Climbing Deer Stand 2024
- Best Hang On Tree Stands 2024
- Best Quadpod Deer Stand 2024
- Best Tripod Deer Stand 2024
- Best Lightest Saddle Hunting Platform 2024
- Best Run And Gun Tree Stand 2024
- Best Tree Stands For Money 2024


Leave a Reply